Monday, June 24, 2013

Washi Tape Tutorial

Hello Friends

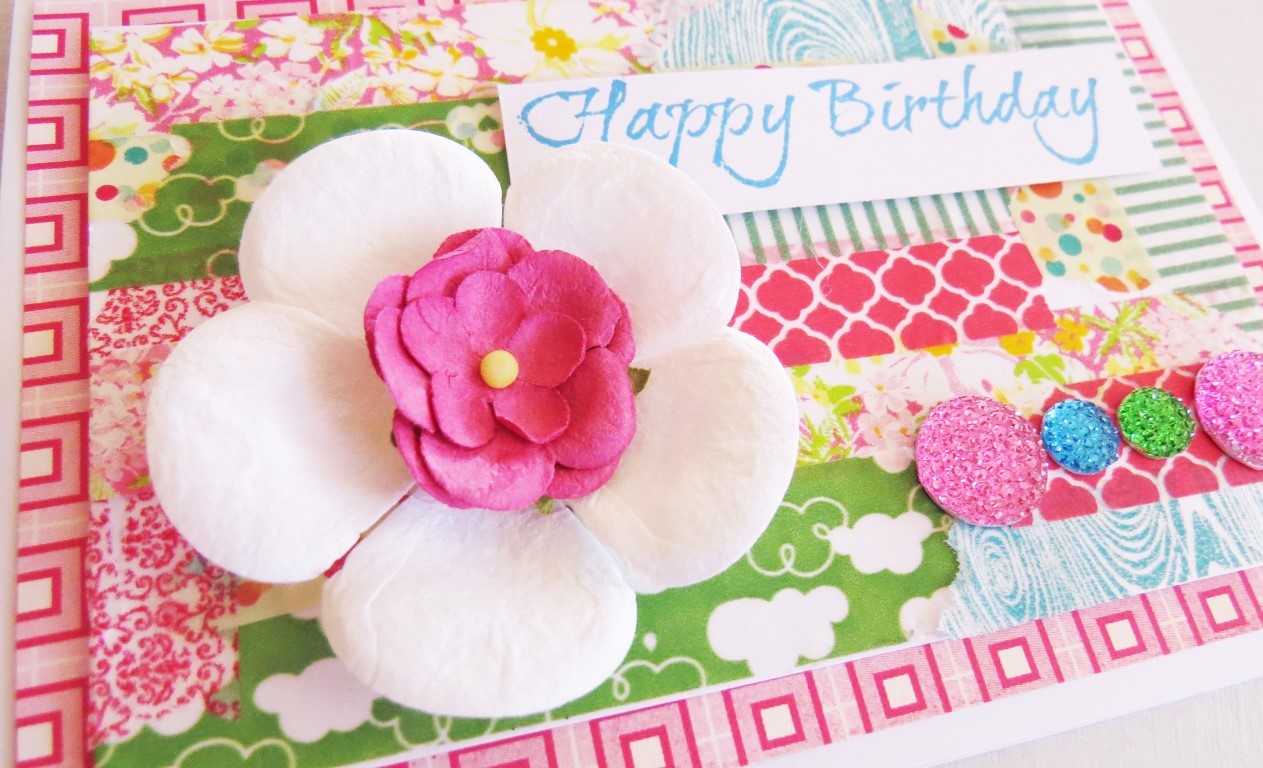
Another Video is up and this one is a Card Making tutorial using Washi Tape.  Below are some images of the card I create in the video.  Underneath the link to the video (at the bottom of this post) is a special discount  code for all twines, ribbons and washi tape in store, valid for this week only ends Monday 1st July.

Enjoy


Card Making Tutorial Using Washi Tape


Pop in the code WASHISALE at checkout and receive 20% off all items in the Ribbons, Trims, Twine and Washi Dept.  You may add items from other depts. but only these will be discounted.
 
Here is the link happy shopping
 
Anna xx

Thursday, June 6, 2013

New Workshops Card Making for Adults and Butterfly Shadow Box Frame for Kids

If you haven't heard I have scheduled two more classes one for June and one for July

This time the adults as well as the kids get to play

I will be teaching both these classes so come and join me for a creative couple of hours. 

Take a look below for details

Creative Card Making for Adults
Monday 24th June 7pm - 9pm
Box Hill Melbourne


and

Beautiful Butterfly Shadow Box for Kids
Wednesday 10th July 10am - 12pm
Box Hill Melbourne


I look forward to seeing you in class
anna xx

Friday, May 31, 2013

100% Dream Big - Inspirational Messages for your Handmade Cards

As you may or may not know not only do I love to be creative and crafty but I love to inspire others to live their best life as well.   As I grow and change and evolve in my own life its so wonderful to combine my art and send a positive message out there at the same time.

So below I have crafted a card with the inspiring message 100% dream big.  You could absolutely gift it for a birthday or any other special occasion, and I often do this.  If you follow me on instagram you will see that I often post photos of cards I have made for birthdays that have a message on them of positivity rather than just a plain old Happy Birthday! Don't get me wrong HB is perfectly fine as well but it's nice to think outside the realm of the usual card sentiments and  have something original and inspiring.


Many family and friends say that they keep my cards because they are so special and different and often have a sentiment that is inspiring as well as the attention to detail in each card.  I love that they do and even if they don't that's okay too.  From my perspective you can never give out too much love and positivity in the world in whatever form you choose to do it.  Words are so powerfully whether you speak them or write them.

Next time you gift a card try adding a beautiful heartfelt message.  I dedicated a whole kit to inspiring cards called Dream Big you can view it here if you need some inspiration to get you started.

Main items used for this card are Pink Paislee Cottage Farm Ephemera Studio Calico drift wood veneer flowers and leaves. Note I painted some of the wood chips white for the card. Ribbon from Our Ribbon Store

Sunday, May 26, 2013

Step by Step Scrapbooking Layout U R Sweet

It feels as though I haven't scrapbooked a layout in ages and to be truthful I haven't.  The motivation to scrapbook is a challenge these days as I feel more drawn to mixed media art and journalling and cards.  Sometimes the guilt sets in about it but I try not to beat myself up about it as its meant to be fun and not a chore.  So anyway I decided to have a play with some sprays and paints on white cardstock which eventually turned into a layout so I got my mixed media fix as well.

Here it is below, simple but bright and fun. U R SWEET Scrapbook Layout


Step one

On a white cardstock base using inks, sprays and paints and a template of your choice decorate your paper.  It will need drying time between layers.  If you don't have any templates you can make them up by cutting shapes in some paper and then spraying them that way. 

The template used here was  The Crafters Workshop Balzer Designs Circle Regiment 12 x 12 Template and Studio Calico - Mister Huey's Mask - Chevron - 4 x 6 inches.

Step two

The yellow dots were made using a mixture of texture paint with some yellow paint mixed to make the colour for the dots.  I also used a smaller dot template for this but you could use the circle regiment as there are several sizes of circles on it.  Make sure you layer the texture paint thickly so it is dimensional and you will need to let this dry overnight or for a few hours before continuing.


 Step three

While you have the texture paint out mix in another colour and use the cut out to create your shape for a template.  I used the butterfly punch from EK Success Large butterfly punch, and then used the cardstock where the butterfly had been punched out from.  I put it down on baking paper layered the texture paint onto it the whole where the butterfly shape is, making sure it is at least a couple of mm's thick and then lifted of the cardstock and was left with the butterfly shape.  Once again this will need several hours to dry before you can peel it off and it won't break.  You can see mine in the picture below.  When it was dry I dragged a little white paint across it to highlight and give the shape some added definition.


 Step four

Cut some strips from patterned paper and layer them across the page. The patterned paper I used was Pink Paislee Christy Tomlinson She Art - Soar 12 x 12 Patterned Paper.
I cut randomn strips from this paper that I thought would suit my colour scheme.


 Step five and the remainder of the layout

I actually started this layout without a picture in mind.  So once I knew roughly my colour scheme, I went through some photos to find one to suit.  This photo is from a few years ago but suited the theme and colours.

Embellishments I also used to decorate this page were

Pink Paislee Cottage Farm Ephemera.  I used the Hello Flag jouralling card, the strip of Black Arrows under the journalling card and the Yellow and white circle next to it all came from this pack.

Pink Paislee Secret Crush Photograms 
I used the grey card on the right of the photo.  There are several to choose from in this pack.


I spritzed and splattered using color shine from Heidi Swapp - Mustard

I did this in the top right hand corner.  I splattered by opening the lid and pulling the lid off and splattering onto the paper from the end of the pipe attached to the spray nozzle.  I spritzed using the spray nozzle.  You can see the different colours by spritzing it, it actually looks more mustard but by splattering the ink it is more concentrated so looked more melon in colour.  Great effect and suited my page colours just perfectly.

 
To continue the dotty theme I used
I placed them randomnly around the grey u r sweet heart frame see close up below.
Also added some cabachons I had lying around 

 So there you have it a little mixed media using supplies you will probably have on hand.  It was fun to use some paint and actually get messy for a change.  It was also great to keep the layout clean and simple with not too many layers of patterned papers which is my usual style.  Its always a great challenge to get out of your comfort zone and create something a little different. 

I hope this inspired you to get the supplies out and start crafting up a storm.....

Tuesday, May 21, 2013

Gorgeous Gift Tag Making Kit - DIY

Do you love making your own gift tags and cards.  This brand new kit focuses on just the gift tags.  Hours of creative fun to be had and all the supplies are there for you, no running around buying supplies from here and there, just set aside some time, open your pack and indulge in your artistic skills.

In this kit you have 40 assorted tags to make so, you won't be needing to purchase any for a while to come, and your gifts will look stunningly beautiful adorned with your gift tags.

More details of this kit are in the listing, find it here
 
Gorgeous Gift Tag Making Kit - DIY


Don't forget to view our new selection of products to inspire and get you itching to create in store now.

Happy Creating Peeps xx

Wednesday, May 1, 2013

Celebrating Sisterhood - DIY Card Making Kit

Did you know a new card kit was released on the weekend?

Well if you didn't you certainly do now...

This kit is to celebrate all the women in our lives, filled with bright pink, black and grey and featuring some beautiful sentiments on the cards if you are crafty you will love this kit and the cards it will produce with your creative skills.

Grab it here

Celebrating Sisterhood
 
Card Making Kit
 
Designed by Anna Pontikis

 
Here is a close up of one of the cards you will create in this kit
 
just in time for Mothers day, or alter the sentiment to just make it say I love you and you can gift it to anyone.
 
 
Hope you love it as much as I did creating it. 
 

Monday, April 22, 2013

How to plan a 40th Birthday Party

Hey everyone,

It has been a little quiet on the blog front due to all the preparations and time it took to bring together every detail for my 40th Birthday Party Celebration.  As promised and I am not sure on which social media site I promised it but I did promise to do a post with links from where I sourced things for my party.

So here goes super long post ahead.  Feel free to just scroll through photos if you are not interested in the long content.

The planning all began at the start of this year,  although in my mind I knew from this time last year that I wanted to celebrate turning 40 with a party.  Coming from a catering background with my parents owning a reception centre from when I was born, organising parties for me is no big deal.  I knew what had to be done it was just a matter of bringing together all the ideas I have accumulated over the years and to be honest the amazing content now on the WWW makes it super simple.  I did begin a board or two on pinterest to start pinning ideas of things that inspired me and caught my eye that I may want to replicate.  You can view the board here party board.

Back in early Feb first thing I did was find a venue.  I ended up booking the Balwyn Community Centre  Funnily enough I came across this place when I was looking for somewhere to hold my classes last year and I saw this hall as I was walking through and thought it would be perfect as a function room and it was.  Great room, lots of space and a dance floor.  This would be a great place for day time events, lunches etc also and of course classes and workshops if you have larger numbers.  As a side note,  I probably wouldn't leave it so late to book a venue I thought it was really early but a few of the places I enquired about had already booked out at this stage, so if you have your heart set on somewhere book it at least 6 months in advance.  I was lucky this place was still available.

Once that was done it was time for invites.  I sent these out approx 4 weeks before the party.  Of course the link for the all the supplies used in these invites is my website Koko Vanilla Designs


I wanted the invites to be bright.  I wanted to theme everything in my favourite colours at the moment, turquoise, lime, pink, yellow.  Having a few colours gives you more variety in other items like decorating.  It makes it a little easier to find matching supplies.

Onto food I decided I wanted to have catering as I didn't want to have to do all the food myself.  I have a friend who owns a catering business so that was easy I asked here to do a fair bit of the catering you will find her here Sage Leaf Bistro & Catering  Didn't get a chance to photograph the food but it was amazing and everyone commented.  I supplemented the catering with some food I made and some family members held it.  It was all cocktail style food though.

One of the other things high on my list was a dessert table.

I pinned an amazing cake on my pinterest board, a ruffle cake and then went it search at the last minute like two weeks before to find someone who could make it.  Another note don't leave it that late as once again a few people I contacted were fully booked luckily Debi from Studio Cake had one spot left and offered to make this beautiful cake you see pictured below.  I highly recommend Debi she was lovely and friendly and really helpful and you can tell she loves her work.  She absolutely went above and beyond.  I always look for that trait in people I have dealings with because I am the same I have that expectation of others.  By the way the cake on the inside is chocolate mud and it was so decadent and lovely to eat.


Below you will see photos of my dessert table.  The hardest part about this was that I could only access the venue for set up around 5pm so I knew it had to be quick and easy to set up.  I ordered a few of the items that are on this table and then some family members added to the collection.  In the end it was a very full dessert table.


I also ordered for the dessert table yummy cupcakes from a Teacher and Parent at our local primary school who also runs a cupcake business.  These beautiful cupcakes were made by Linda at Cupcakes by Linda.

The flavours I chose were Red Velvet, White Chocolate and Raspberry and Vanilla.  The cupcakes tasted delicious and looked gorgeous and once again Linda was really helpful and lovely with my requests and I highly recommend her services too.  She has lots of other flavours and sizes to choose from too at her website.


Another cute idea I did for the dessert table which I have seen everywhere are cute mini wrapped chocolates.  Aldi makes a mini sized bar and they come in packs of 5.  There are a few flavours.  I purchase mixed flavours.  I then unwrapped the outer layer and lef the layer underneath which is foil.  I then re wrapped them with Kraft Paper and decorated them as in the photo below.  I did this using the same papers I used for my invitations.  Once again all the supplies are from my site.  These would make a great alternative to lolly bags for any sort of party even kids birthdays.


I chose to make tissue paper garlands to hang around the room.  I knew these would be easy to hang as I premade them before the day, they were strung up and ready to go.  They are time consuming but look great and can be done ahead of time.  The photo below shows you how we strung them up.  They were easy to hang because there were beams coming across the ceiling.  I also put a couple around the dessert table and above it see photo above.  I also purchased some honeycomb balls from ebay in Hong Kong.  One batch arrived and one didn't even though I purchased them 4 weeks ago.  You can see them hung up on the sides.


Music for the night was my brother DJ Pepp

You can just see him in the photo on the side, he is awesome and highly recommend.  Best DJ everrrrr.  Played great music and extremely helpful.


You may have also noted a projector a couple of photos up.  We made a slide show of photos of my life so far, the kids helped with this job.  We then hired a projector from someone local from gumtree and had the projector running through the night.

I think that's about everything and here are a couple of photos of the final item you need for a party family and friends.


It was a really fun night with lots of laughs, conversations, dancing, music, eating and drinking.  Lots of work involved but so worth it to have the memories.  I hope you find some handy tips and links here if you are planning your own party.

If you have any questions feel free to ask away, I hope I haven't missed anything. Happy to impart my knowledge and advice for anything else I may not have mentioned here.
 

LinkWithin

Related Posts Plugin for WordPress, Blogger...