Thursday, June 30, 2011

Cupcakes & Butterflies Card Making Kit

Hi Everyone

Just popping in to share our newest kit.  This one is great for beginners as it is a smaller card kit and great for those of you that want to sample what the kits are like.  However.... having said that it is still great for all the seasoned (experienced) card makers.

take a looksy...

Cupcakes & Butterflies Card Making Kit


Today was the last day of term for two of my kids.  Holiday time again.  It will be nice having a break to be honest from all the running around.  We have an activity every night of the week between my 3 kids and then Saturday's as well.  So even though there is more entertaining and supervising at least it will be at a more relaxed pace.  I'm hoping anway.  Oh and if you would like a fun way to keep the kids entertained we have a very popular card kit for kids.  You can purchase one for the kids and the one above for yourself and enjoy some quality creative time together.  Perfect for a cold and rainy afternoon.  Kits can be themed for boys as well.

Back with more soon.

Monday, June 27, 2011

Craft Room Inspiration

Just came across this blog Tip Junkie with some gorgeous craft room diy's and I just had to share this photo.  There are a few others to look at on the blog but this one makes my heart sing


Love the colours, especially those cabinets, gooooorgeous.  The cutesy chandelier so divine.  Oh well there is nothing wrong with dreaming is there????

Thursday, June 23, 2011

My Creative Space Today

Well further to yesterday's post I finally did clear my desk and create these tags.  These tags were a custom request for a  customer who wanted to attach some tags to her party favours for her 40th Birthday Party.  She gave me her criteria, colour scheme and suggested a few of the other tags she had seen on site and asked if I could come up with a design that she then wanted to purchase as a pack and make up her own tags for her 24 guests as she wanted to be part of the creative process.  I absolutely love that she chose to get involved rather than asking me to make them all up for her.
Below is my design.  I actually made up two different designs and she loved them both so she has purchased a mixed kit.  If you have a custom request please email me at kokovanilla@live.com.au.  I love designing and custom requests are a favourite as they push me out my familiar creative zone. 

Thank You Tags


I am sharing today's post on this great blog I have recently discovered called our creative space.  Every Thursday a whole lot of other creative bloggers share what they have been working on.  Great way to be inspired and just connect to what other like minded people are doing.  It's fun take a look.

Hope it inspires you to put aside that long to do list of jobs that never ends and nurture your souls calling to create something beautiful instead.

Anna xx

Wednesday, June 22, 2011

Hoot Hoot

Calling all you Owl Lovers out there, myself included.  Carolees Creations have come up with the pink version of their previous Owls All Around in Green.

Cute matching ribbon and paper.  Owl Heaven.... ready in store now to add to your owl collection.  If you don't have one you can always start one.


Hope you are having a lovely Wednesday.  I have been super busy no real time to stop and chat on the blog today.  Plenty of new items coming in and a run of custom orders has kept me on my toes (so to speak) and my studio desk is looking a bit worse for wear and you know what they say about a messy desk.  That's next on my to do list before I get stuck back into some designing some cute birthday tags which a customer has enquired about.

Anna xx

Wednesday, June 15, 2011

New Paper Posies In Store

All our other gorgeous paper posies have now sold out so its time for something new and fresh to take their place.  Here is the first of the bunch.  They are super cute and make your projects look so bright and colourful.  These are available in store here.


On another note thank you for all the positive feedback both on the blog and on the facebook page regarding the tutorial below I am so excited that you all loved it.  I love doing this sort of thing and its just a time issue for why I don't do more.  As always however you can find the card kits on our site which follow this same pattern of instruction the only difference is you recieve all the supplies in your pack to make it.  You can find all our kits on site.  DIY Craft Kits and Card Kits.

I am just about to start designing a new beginner card kit.  I didn't replace the previous one and I know some of you just want a sampler kit when you are just starting out with your card making.  So this is next up on my very long to do list.

Hope you are enjoying some sunshine today.
Anna xx

Monday, June 13, 2011

DIY Scallop Circle Paper Bunting Tutorial


There are so many gorgeous and inspiring paper buntings around that I just had to jump on the bandwagon and have a play.  Given that it was a long weekend here in Melbourne and the kids are home I had two main criteria it had to be quick and easy to create and something the kids could join in and help with.   It is so much easier when trying to do these tutorials having someone at home to take the photos.  My daughter Melanie was behind the camera for some of these shots. 

DIY Scallop Patterned Paper Bunting Tutorial


These buntings are popping up everywhere, from party decor, desert table decorations, bedroom decor, you can use these just about anywhere.  I just hung mine up across my bookshelf to show you how it looks when hung.  Gorgeous don't you think I can see this hanging with some matching party decor even across the ceiling over the party table.  Instructions below.


1. Supplies as per first photo, patterned paper of your choice, I used a Cristina Re Damask Design which had a striped pattern on the alternate side so I was able to use two patterns with the one paper.  EK Success Scallop Circle Punch once again you can use any size scallop circle you wish mine was a 1.5".   Double sided tape and Bakers twine or ribbon to string it with.

2. Punch out plenty of scalloped circles with your punch.  This will depend on how long you would like your bunting to be.  Just keep punching and adding until you think the bunting is long enough.

3. Once these are punched fold them in half.  This is easy enough although with the striped side I had to make sure the stripe was all facing the same way.

4.  Along the inside fold put a strip of double sided tape or glue I use double sided tape because I don't like messy glue.  Also put a little bit of tape going the other way, so across just below the fold and then a vertical strip.  When you fold the circle over it keeps the twine in place and the fold stays closed it doesn't flap back open. 

5.  Now position the circle under your strip of twine and once it is positioned where you want it to stay fold the scallop circle over sandwiching the twine inside it and press down.  This will keep the twine in place and the scalloped tightly shut.  Then repeat alternating the different paper pattern and positioning each scalloped circle where you would like it to go.  The gap I had was approx 1cm.  If you prefer not to have any gap that would also look good as well you might just be punching circle for hours this way

6.  I cut the twine at the very end when I knew my bunting was long enough.  I also left a long strip of twine at the start and the end of the bunting for ease of hanging up.  Voila how easy is that.  Super easy and super cute.  No excuse not to have one of these for your next party.  No hand cutting involved punches make life so easy.  Of course you can use a few different papers if you like or make it all randomn using any paper that would be really colourful.  A great way to use up all those paper scraps.

As always the supplies to make these products can all be found in store. The link to each product is found in step 1 of this tutorial.

Hope you are inspired to make your own and if you do I would love to see some photos or a link to your blog if you have one you can leave a comment with your blog link.

Anna xx

Tuesday, June 7, 2011

DIY Handmade Circle Embellishment Kit in a Bag - NEW


Here it is the first of our new look kits DIY Handmade Circle Embellishment Kit in a Bag .  As you can see this one is lots of fun for adults and kids alike.  These cute circle embellishments are fun to make, plenty of creativity needed here  These kits are for sale now and you can find out all about them on site here.  The last photo shows some examples of how you can use your embellishments.  Great for tags, lolly bags, party decor, paper garlands, card toppers, cupcake toppers, kids party craft idea.  Head on over and take a look at how many items you get in this kit.

Anna xx

Sunday, June 5, 2011

EK XL Butterfly Punch

EK has finally created a larger butterfly punch.  I must say it is very pretty.  It is a different style and design to the large Butterfly punch.  This one is labelled as XL and is in the new slimline range of punches  You can view it here (also photo below) and the dimensions are in the listing.


I have also topped up some of the scalloped circle punches and Martha Punches and there are more on order and on their way.  Trying to keep a good stock up of the punches as they seem to sell out really quickly.

Also I have started making some changes to the store and there are many more to follow.  As the website has expanded and we now stock more products its time to divide departments so it is easier to follow and find everything.  It would be great if there was a search button, but my web provider doesn't currently offer this feature.  So it is a work in progress requiring time and patience on my behalf , therefore if items are not where they should be that is why.

Many more new kits are coming soon.  I am expanding the range and style of card kits as well as other types of kits.  Plenty more for kids and adults.

Most of the current card kits are on sale as I am eager to sell all remaining stock of the current kits to make way for the newer kits so head on over and see if any take your fancy.

Okay well time to wind down and get a good nights sleep ready for the busy week ahead.

Anna xx

Wednesday, June 1, 2011

Having your own business.


In the mood to share some insights I have been having lately about what I do and why??

Before I begin I have to say I absolutely LOVE the quote above it really sums it up beautifully, I don't know the source so I can't credit it here but whoever wrote it thank you for your lovely words!!

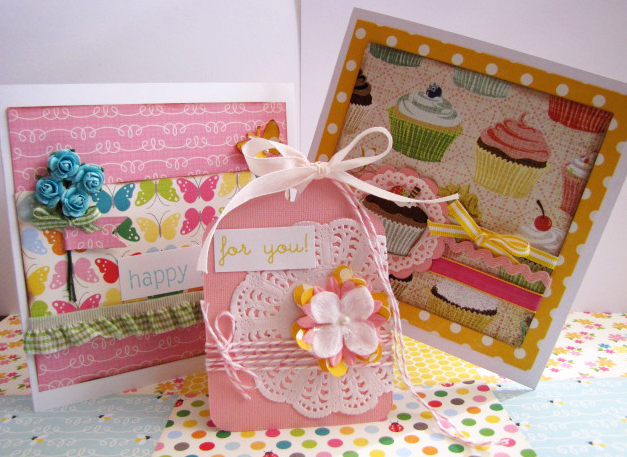
The past week has been really busy, especially since our sale last week packing all your orders and shipping them out as quickly as possible.

I love putting orders together its such a great feeling seeing how customers choose their items the things they purchase that go together, the beautiful colours of everything, the variety of supplies.  Each order is different from the next - always.  One thing I have noticed especially in the last month is that I as I have gone out on a limb and begun to source my own supplies and using different ideas of my own, moving away from the mainstream of scrapbooking supplies and clearly it has been recieved well.  Many of these orders were filled with items that I have sourced to sell on site that I really love.  It is a confirmation to me that I am on the right track in where I am taking my business and what I would like to present to my customers.  I have always said I only sell what I absolutely love which is why I don't stock whole lines of items only parts of them that resonate with me.

You see I have so many ideas in this head of mine that sometimes its frustrating as there is only one of me and only so many hours in the day and I want to do it all.  I am highly work oriented and have been from a young child that its hard to switch off.  Often just as I get into the momentum of working it is 3.20pm and time to pick up the kids and the reality is the working day is pretty much over once the kids are home until after they have gone to bed which is great if you are a night owl, not me however, I can do the early starts but struggle with the late nights.

So with that said I am constantly evolving this lovely little business of mine which I adore so much. To those who said it couldn't be done, I say it is being done. So greatful that I can do what I love doing and raise a family at the same time and be there for them as well.  It's not always easy and it certainly is a balancing act and I have plenty of moments when I doubt myself.

If I had to sum up what I feel I miss out on working from home

1.  The social aspect of going to work and spending the day working around others, it can be a bit quiet and lonely around here sometimes.
2. Working from home can feel like you are always home, which can be isolating.
3.  Not having a regular paycheck from week to week which you can depend on week in and week out as its always fluctuating.
4. Finally one of the biggest drawbacks is that it's hard to switch off and have boundries between work and family life.

On the positive however, I get to do what I love doing and am constantly challenging myself to come up with new ideas and concepts.  I love being creative and designing.  I love the feedback from customers and networking with like minded people.  It is so important to surround yourself with people that encourage you and lift you higher and have the same work ethic you do.  I can usually discern a person and whether they operate with integrity or not pretty quickly.  Being intuitive and following your instincts when you own your business is a must have skill.

So to sum up why I have my own business.  The quote at the top of the page says it all.  I know this post hasn't been a creative one but I am sure there are those of you who love to hear about the real life stuff of having an online business.  I try to keep it real here and yes doing what you love inspires others to do what they love.  Spending 8 hours a day doing something that you hate or just because it makes lots of money but you can't stand being there is a recipe for disaster.  In the long term it will wear you down and eventually even create an illness not to mention make you a difficult person to be around because no doubt you are miserable and probably take it out on your family or those you love.  Always pursue what you love to do and are passionate about if you have the option to and if its not an option right now begin to take steps to make it possible after hours.  Another of my favourite quotes "You don't need to see the whole staircase to take the first step."  Just begin where you are and do what you can and one step will lead to the next.

Okay well its way past my bedtime and I have gone on for way too long.

Night
Anna xx

LinkWithin

Related Posts Plugin for WordPress, Blogger...